CTC
212 - Lecture 11 (Cells & Cell Libraries)
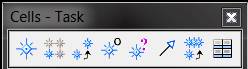
|
Placing Cells |
|
|
Download Cell Libraries |
|
|
Attaching a Cell Library |
Element, Cells, File, Attach |
|
Place Active Cell |
|
|
--Active or Relative Placement |
Active Placement (cell placed on levels on which originally drawn)
Relative (cell element on the lowest level is placed on the active level and other cell levels are shifted) |
|
Place Active Cell Matrix |
|
|
Select & Place Cell |
|
|
Identify Cell |
|
|
Place Active Line Terminator |
|
|
Replace Cell |
Box 7-Replaces cell with cell of same name-use for updating cells |
|
Creating A New Cell Library |
|
|
Creating a new Cell Library |
Element, Cells, File, New |
|
Step 1-Specify seed file |
Seed2d.cel for 2d cells; seed3d.cel for 3d cells |
|
Step 2-Specify name and directory of cell library |
|
|
Step 3-Click OK button |
Closes dialog box and creates new cell library |
|
Creating New Cells |
|
|
To consider before starting |
Working units, cell rotation, cell origin |
|
Step 1-Draw the elements |
Seed2d.cel for 2d cells; seed3d.cel for 3d cells |
|
Step 2-Group elements by fence or element selection |
|
|
Step 3-Define Cell origin ( |
|
|
Step 4-Click create button |
Element, Cells |
|
Step 5-Enter name |
Use short, descriptive name |
|
Step 6-Enter description |
Give more detail on cell |
|
Step 7-Enter cell type |
Graphic (keeps attributes, levels, and keypoints of its elements); Point (uses active attributes/level and uses global origin as keypoint) |
|
Step 8-Click Create |
|
|
Cell Housekeeping |
|
|
Drop complex status |
Tools, Drop-Box 2 |
|
Fast Cells View |
Settings, View Attributes - Turn on/off fast cells view |
|
Library Housekeeping |
|
|
Edit cell name/desc. (10-38) |
Element, Cells, Edit Button |
|
Deleting cell from library (10-39) |
Element, Cells, Delete Button |
|
Compressing Library (10-39) |
Element, Cells, File, Compresss |
|
Creating a New Version of Cell (10-40) |
Basic steps are to place cell, drop complex status, revise cell, and put new revised cell back into cell library |